If you’ve ever noticed dents, cracks, or small holes in your wall, you know how much they can affect the appearance of your home. Learning drywall repair is one of the most valuable DIY skills for homeowners because it saves money and keeps your living space looking polished. With the right tools, a little patience, and some basic knowledge, you can fix drywall damage on your own and achieve professional-looking results without hiring a contractor. In this expert guide by Robert Broadhurst – Plaster & Repair, we have prepared a step-by-step guide of drywall repair for beginners.
Quick Fix Walls: The Beginner’s Guide to Flawless Drywall Repairs
Drywall damage is a common problem caused by moving furniture, hanging wall décor, or simply everyday wear and tear. Taking the time to learn this skill not only helps you maintain your home but also gives you confidence as a DIYer.
All the beginners here use this guide for a successful drywall repair:
Step 1: Assess the Damage
To guarantee the proper repair technique and a longer work lifespan, evaluate the repair area, identify whether it’s a small nail hole, medium-sized dent, or larger hole that needs patching, and address the leak source before repairing the drywall.
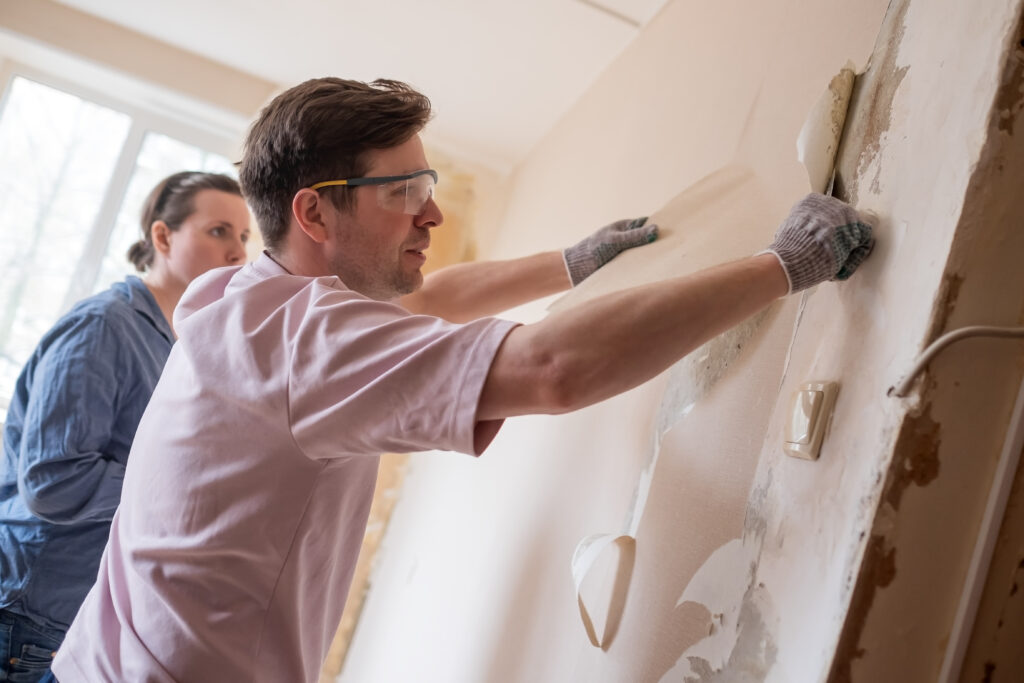
Step 2: Prepare the Area
Remove any loose drywall, dust, or paint to create a smooth finish. Then, use a utility knife to trim any jagged edges and a moist cloth to wipe the surface to ensure that the joint compound or patch adheres properly and doesn’t peel off later.
Step 3: Patch Small Holes & Cracks
Apply a tiny bit of spackle to a putty knife, smooth it out, and allow it to dry as directed by the product’s instructions to fix nail holes, cracks, or minor dents. If necessary, fill in the damage with a second thin coat.
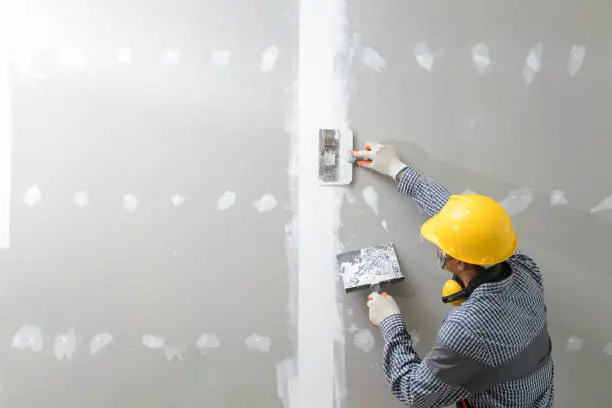
Step 4: Repair Medium to Large Holes
Use mesh tape or a patch kit for holes bigger than a coin. Let the edges blend in with the wall surface as you apply the joint compound and adhesive patch. It might be necessary to apply several layers, letting each one dry completely before applying the next.
Step 5: Sand the Surface
Once the compound has been removed, use fine-grit sandpaper to gently sand the repaired area, making sure it is flush with the wall. For a professional appearance, this step is essential. Before painting, use a moist cloth or tack cloth to remove any dust.
Step 6: Prime & Paint
To seal the compound and avoid uneven paint soaking, prime the patched area. Paint the area the same colour as the rest of the wall after it has dried; two coats may be required for a perfect match, depending on the type of paint.
Perfect Patch Playbook: Mistakes to Skip & Flawless Finish Tips
For those who are new to drywall repair, we also have a guide on common mistakes to avoid. Additionally, we have provided a list of tips that will ensure a successful drywall process and a long-lasting finish.
Read the following guide to mistakes to avoid and the steps to take to ensure a long-lasting finish:
| Mistakes to Avoid | Pro Tips |
| Skipping prime | Always prime before painting |
| Using thick compound layers | Feather every compound layer |
| Not feathering edges | Sand lightly between coats |
| Rushing drying times | Use matching paint |
| Skipping necessary coats | Extend compound past patch edges |
| Ignoring leaks or damage causes | Use mesh tape for big holes |
Conclusion
Gaining proficiency in basic drywall repair is a fulfilling DIY ability that will enable you to maintain your house in top condition, save money, and increase your self-confidence as a homeowner. You can effectively address wall damage and accomplish faultless, expert-level results by following these simple, beginner-friendly steps. Recall that the key to success is patience, appropriate technique, and meticulous attention to detail. Your walls will look brand new after practice because your repairs will blend in perfectly.
FAQs
Q. Can a repaired drywall area be painted with ordinary paint?
Always prime before painting for optimal results. By sealing the joint compound, primer guarantees a smooth finish and uniform paint absorption.
Q. How long does it take for spackle or drywall compound to dry?
Although drying times vary by product, thin coats typically take one to two hours. Consult the manufacturer’s instructions at all times.
Q. After patching, how can I match the paint colour?
Get a color-matching sample from your neighbourhood paint store or use any leftover paint from the original can. To find the best fit, start with a small area.
Q. Should I hire a professional to fix big holes, or can I do it myself?
You can DIY drill for small to medium holes (up to 6 inches). It is safer to hire a professional for very large holes, structural damage, or water problems.